
- This article is outdated and might only be applicable to older device models. Please manually install ElephantDrive. To learn more, visit https://support.elephantdrive.com/hc/en-us/sections/200928608-Western-Digital-WD-.
- Important: The instructions in this article is for WD firmware version OS 3 and not OS 5. If you have any questions, please create a support ticket.
ElephantDrive comes pre-integrated with your WD NAS device. Before you setup your WD NAS to backup to ElephantDrive, you need to link your ElephantDrive account to your WD NAS by turning-on ElephantDrive and then login to your ElephantDrive account on the WD NAS interface. We will take you through each one of these steps below.
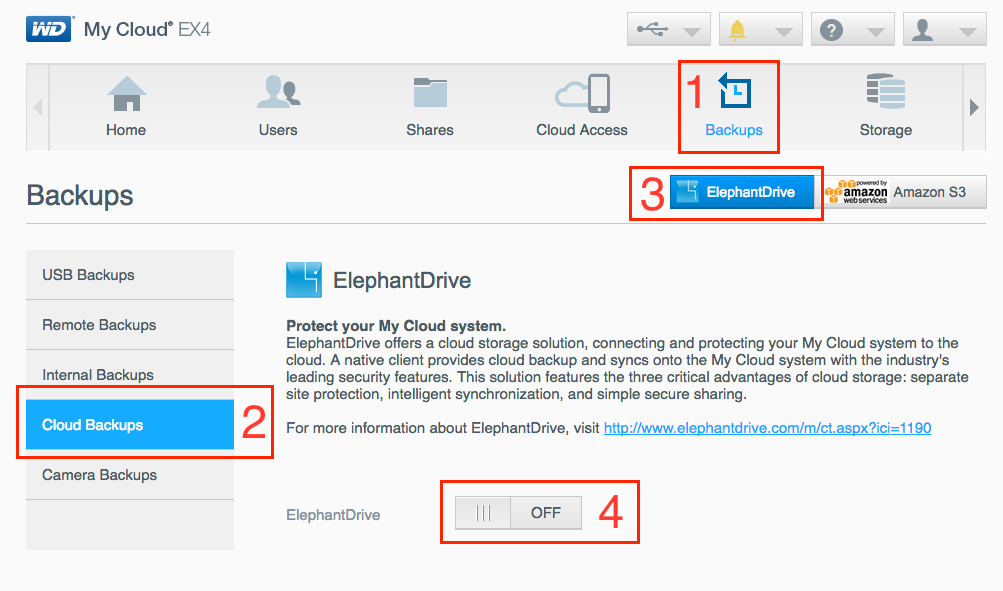
1. ElephantDrive is located under Backups → Cloud Backups → ElephantDrive.
2. Click the OFF/ON button to turn-ON ElephantDrive.
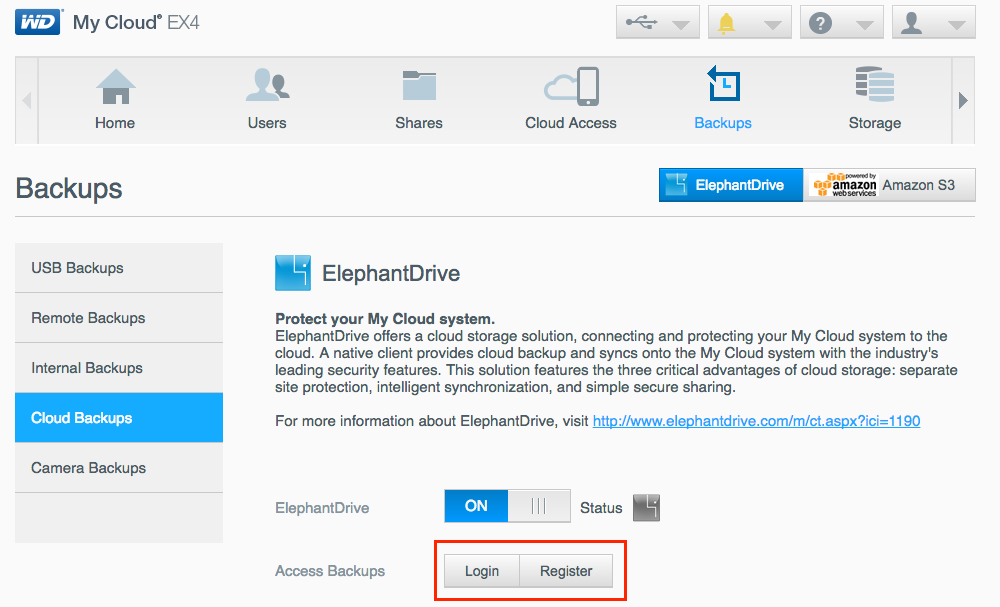
Once ElephantDrive has been turned ON, you can either create a new ElephantDrive account right from here or login to an existing ElephantDrive account.
- To create a new ElephantDrive account, see step 3.
- To login to an existing ElephantDrive account, go to step 6.
3. Click Register to create a new ElephantDrive account.
- When you create a new ElephantDrive account through this interface, you will receive a 50GB promotional account for 30 days. You can change your plan later at the ElephantDrive website.
4. Enter an email address and choose a secure password for your account. Once you choose credentials, click Register.

5. Click Login and the ElephantDrive login window will open.
6. Enter your ElephantDrive account credentials and click Login.

7. Once you've successfully logged-in with your ElephantDrive account on the NAS, the Status icon will change from gray to blue. It will also show Online when you mouse over the blue icon. Congrats, this means you've linked your WD NAS to your ElephantDrive account!

Next, you can setup your data/shares to backup to ElephantDrive Cloud. Just click New device backup wizard link to get started. After you click on the New device backup wizard, you can also follow along with the Backup Wizard Tutorial here for additional assistance.
Comments
0 comments
Article is closed for comments.